
MovieFlo.AI Guide
Getting Started
Introduction
Account Creation
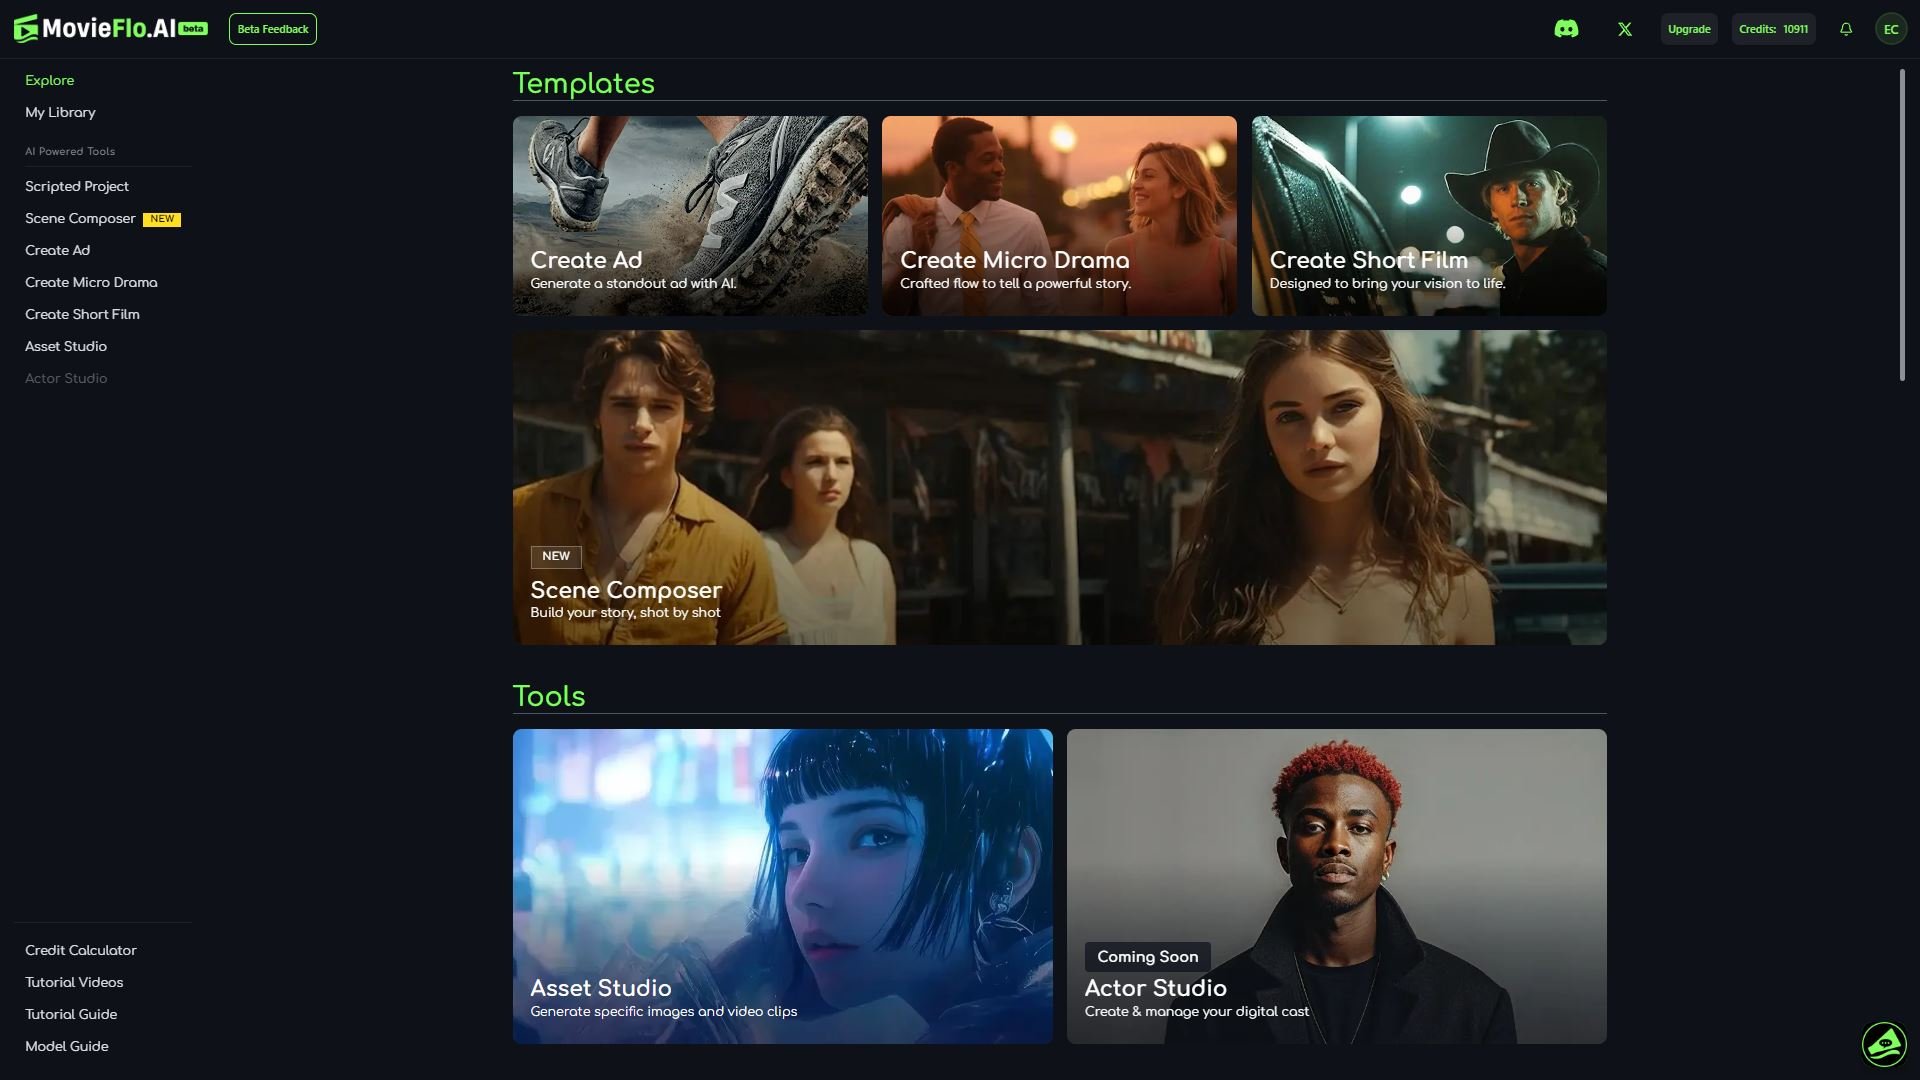
Explore - This is the central hub of MovieFlo.AI. Here you can find our Tutorial Guide & Videos, as well as our Gallery.
My Library - This is a collection of your Projects, Scenes, Images, Actors and other assets you have uploaded or created on MovieFlo.AI. Everything you create is automatically saved here, so you can view all of your creations and go back and reuse or edit them.
Scripted Project - This is the starting point for bringing your ideas to life! Clicking this will start you on the process of creating your new story project.
Create Ad - A quick access point to create an ad for your product.
Create Micro Drama - Create your own micro drama with the Hook-Point-Payoff-Hook cycle.
Create Short Film - Bring your ideas for a short film to life.
Scene Composer - Create individual scenes and shots using reference images and actors from My Library without using a script.
Asset Studio - Generate images with your choice of image model. It’s a quick and easy process!
Welcome to MovieFlo.AI! This guide will walk you through the simple steps to transform your ideas into compelling visual narratives – from concepts and scripts to storyboards, actor and location visuals, AI-generated video clips, and finally, assembling and exporting your final movie.
**Please note that MovieFlo.AI is currently a desktop web app. It is not currently optimized for mobile devices.
Let's get started!
The first thing you will need to do is create an account. Just click on the SIGN IN button in the top right corner of the screen. Then, you have the option of continuing with a Google account, or manually signing up with an email address and password. We bet you have done this before!
Site Navigation
Project Settings
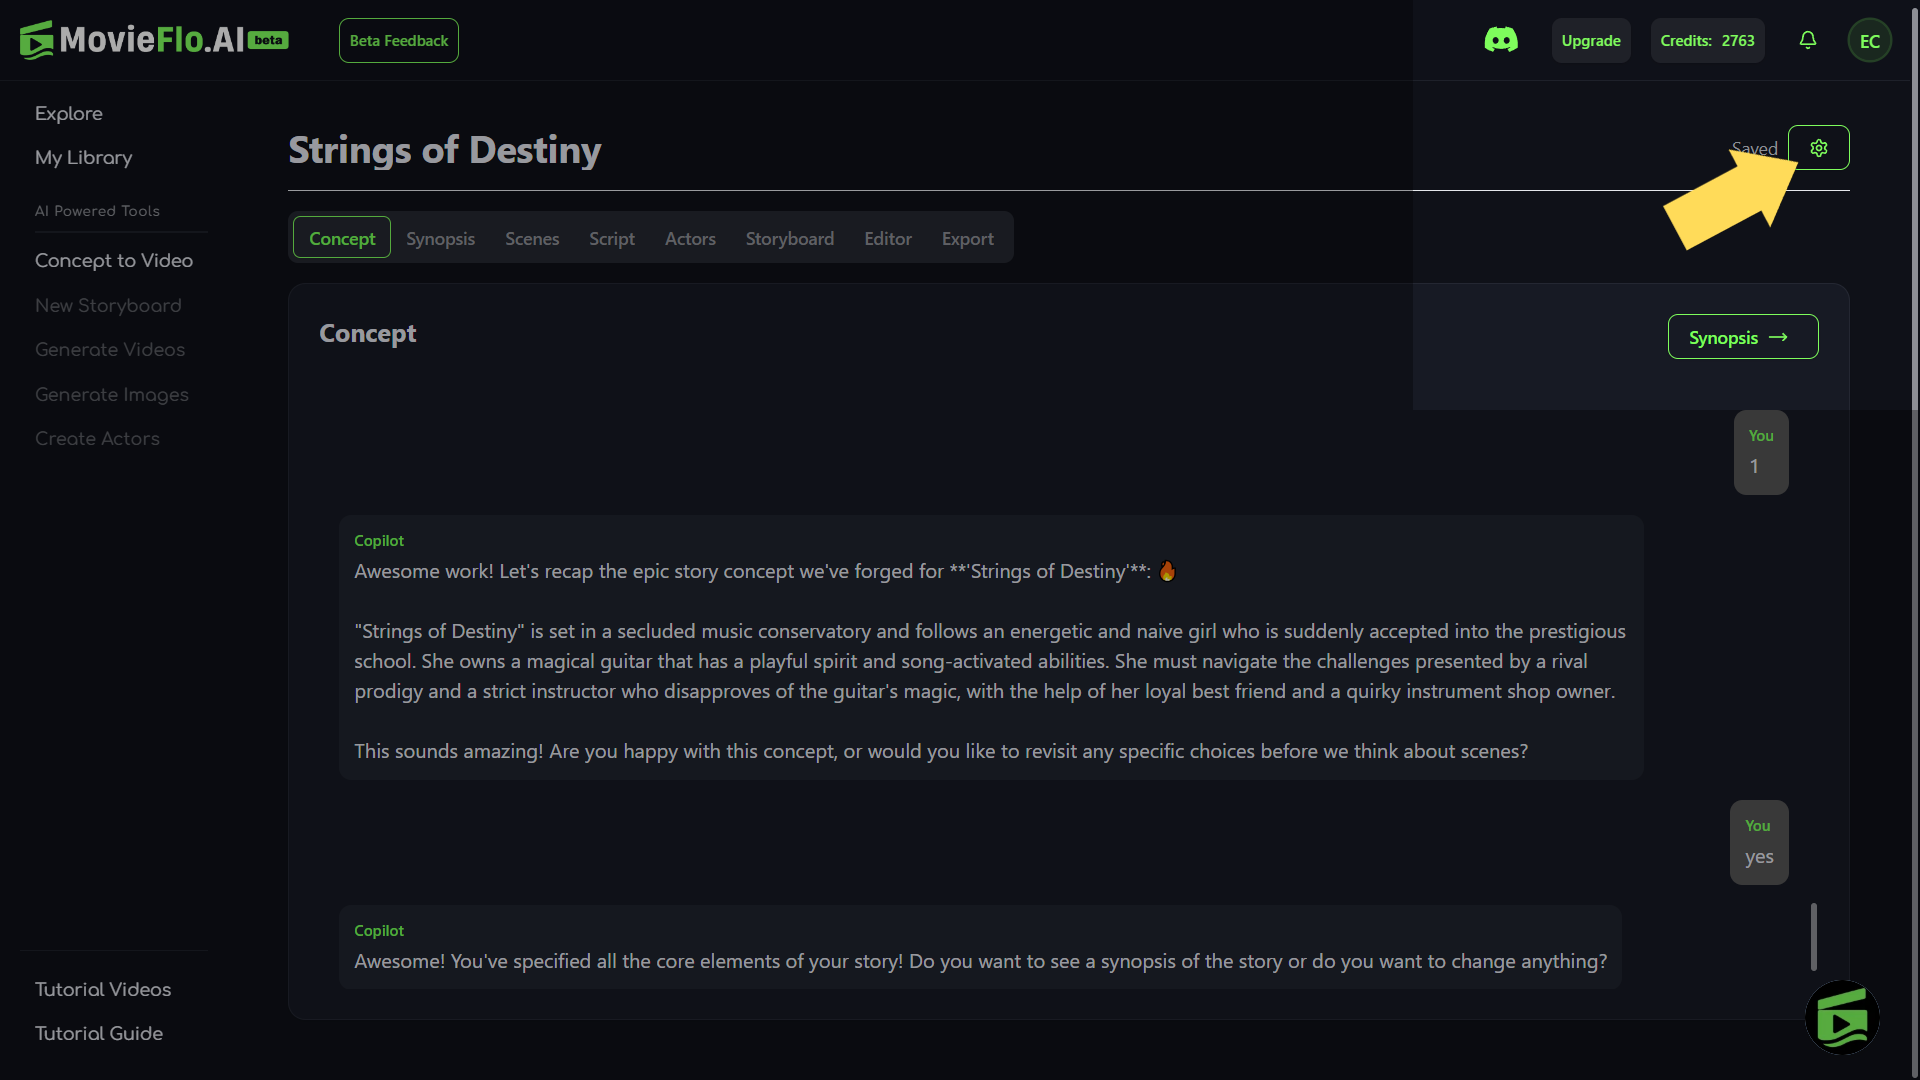
Once you have started your project, the a Settings button can be found in the upper right of the UI. The button image is a Gear icon. The Project Settings modify many of the initial setup options for an existing project.
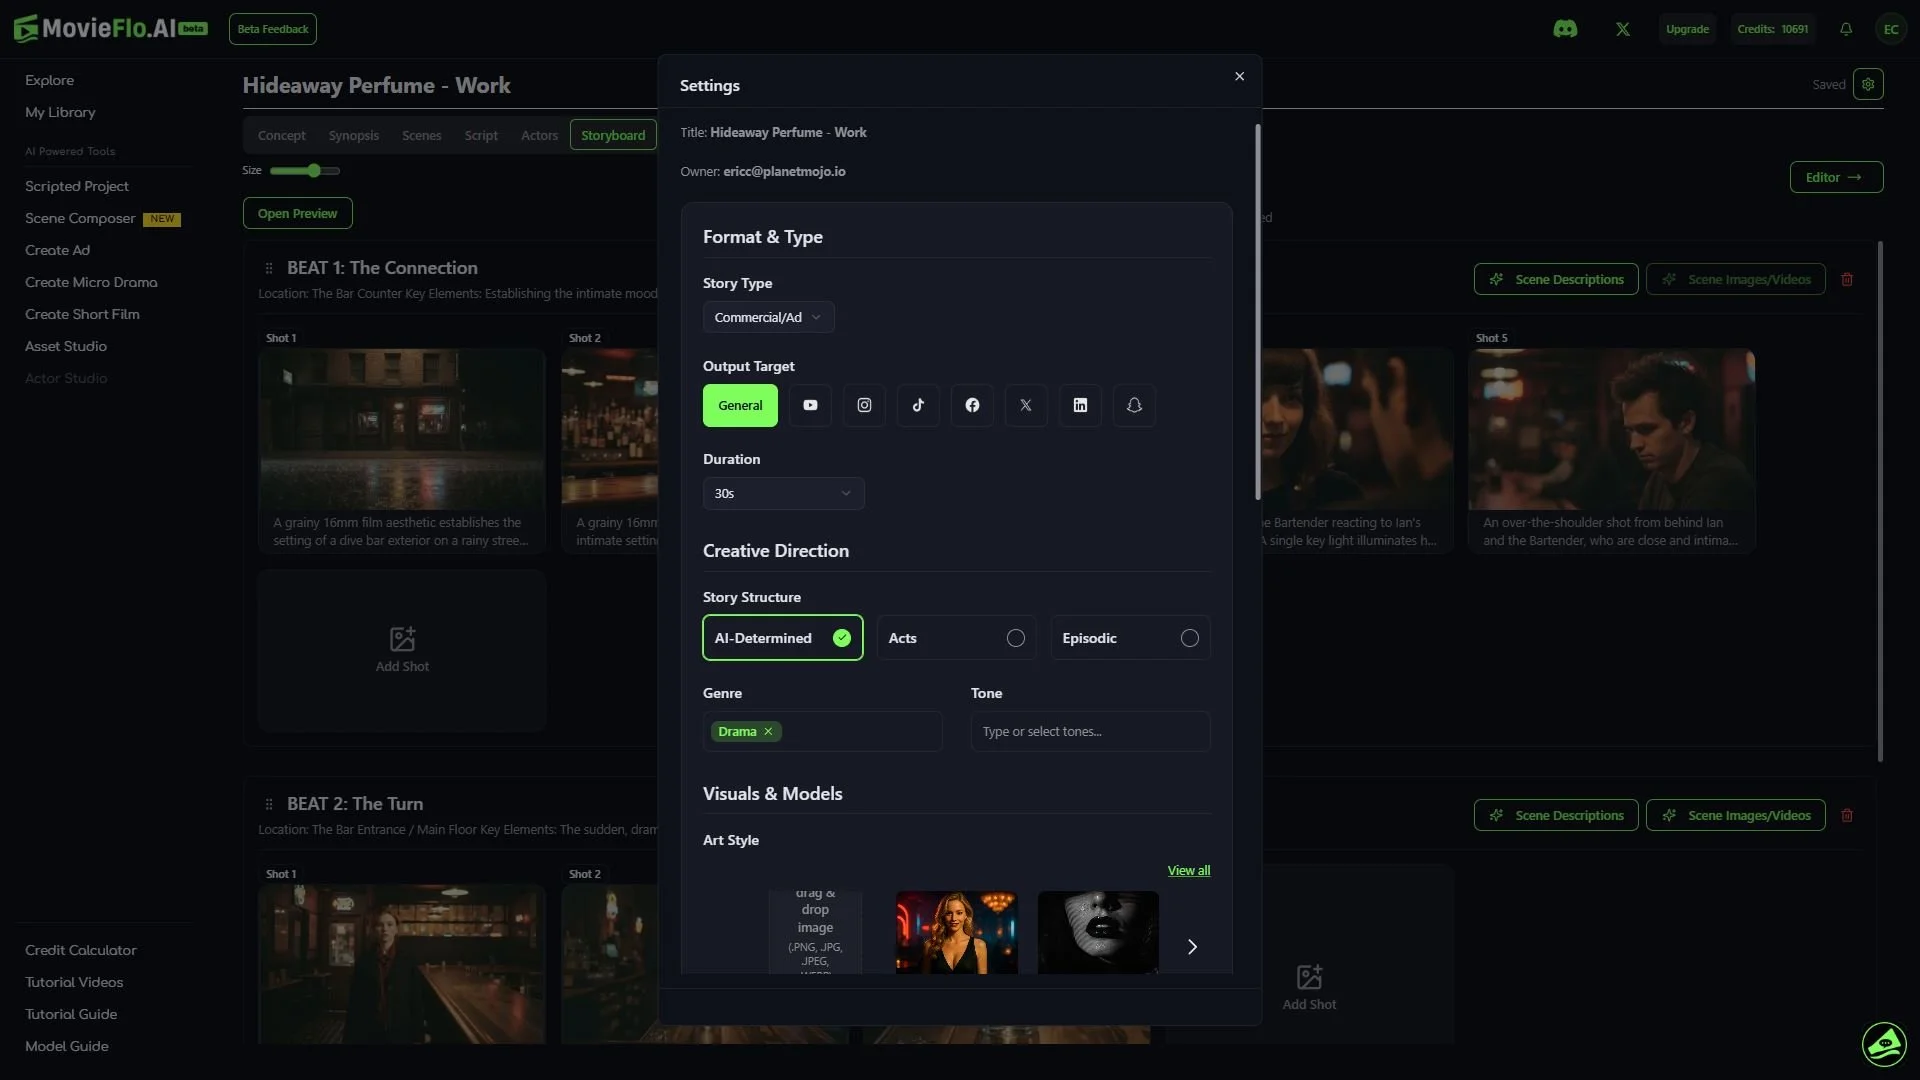
Format & Type
Story Type: Options include Custom, Short Film and Commercial/Ad.
Output Target: Available choices include YouTube, instagram, Tiktok and more.
Duration: Change the intended length of the story.
Creative Direction
Story Structure: Options include AI-Determined, Acts and Episodic.
Genre & Tone: Genre will define the overall style or category of your script. Tone will influence the mood and emotional impact of your script. You can add these manually by typing them in or by selecting them from the dropdown menu.
Visuals & Models
Art Style: You change your Art Style whenever you like. Note: You will have to regenerate any image prompts for this to take effect.
Aspect Ratio: You can switch your aspect ratio, but will need to make sure you clear out all storyboard images and regenerate all the shots in order to get the change.
Default Image/Video/Lipsync Generation Model: You can globally specify your preferred Image, Video and LipSync generators here.
Story/Prompt Suggestion LLM Model (Available for Pro and Ultimate Subscribers only) - Choose from a variety of different LLM Models to refine how your story’s text and prompts are generated.
You can also Transfer Ownership of your project to a friend to work on. **Note: you will not be able to work on it until ownership is transferred back to you.
Type the intended recipient’s email address into the field and click Send Request.
The recipient should then check the Bottom of their library to find the project where they can either Accept or Deny the request.
Credits
Overview - Credits are used to generate content, such as prompts, videos and images in the stories you create on MovieFlo.AI. Users are given a modest amount of credits after they first sign up and verify their accounts. Once out of credits, a user must purchase either Credit Packs or Subscriptions to continue using the app via the “Upgrade” button in the top right of the app.
See the Credits section for information on how to purchase Credits and Subscriptions.