
MovieFlo.AI Guide
Some video models support a feature called First/Last Frame. This allows you to specify the Last frame of a video along with the first frame to better guide and control the shot.
Here are the current Models that use this feature:
Kling O1
Kling v2.1 Pro
Kling v2.5 Turbo Pro
Luma ray-2
Luma ray-flash-2
Minimax Hailuo-02
Seedance v1-Lite
Seedance Pro
Veo 3.1 Fast
Veo 3.1 Quality
Here is a quick tutorial on using this feature and its benefits:
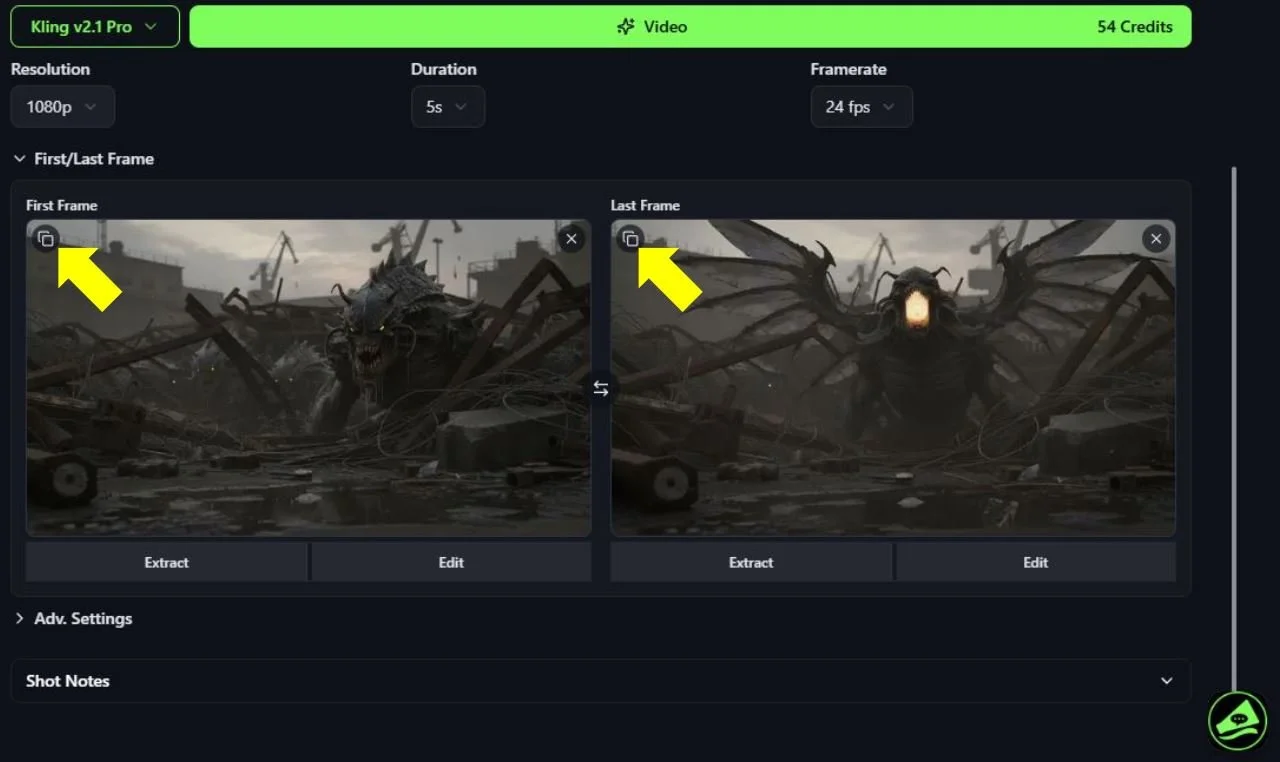
In the First/Last Frame section you will see two image windows, one for the First Frame and one for the Last Frame. If you have already generated an image for the shot, the First Frame image window will show that image automatically.
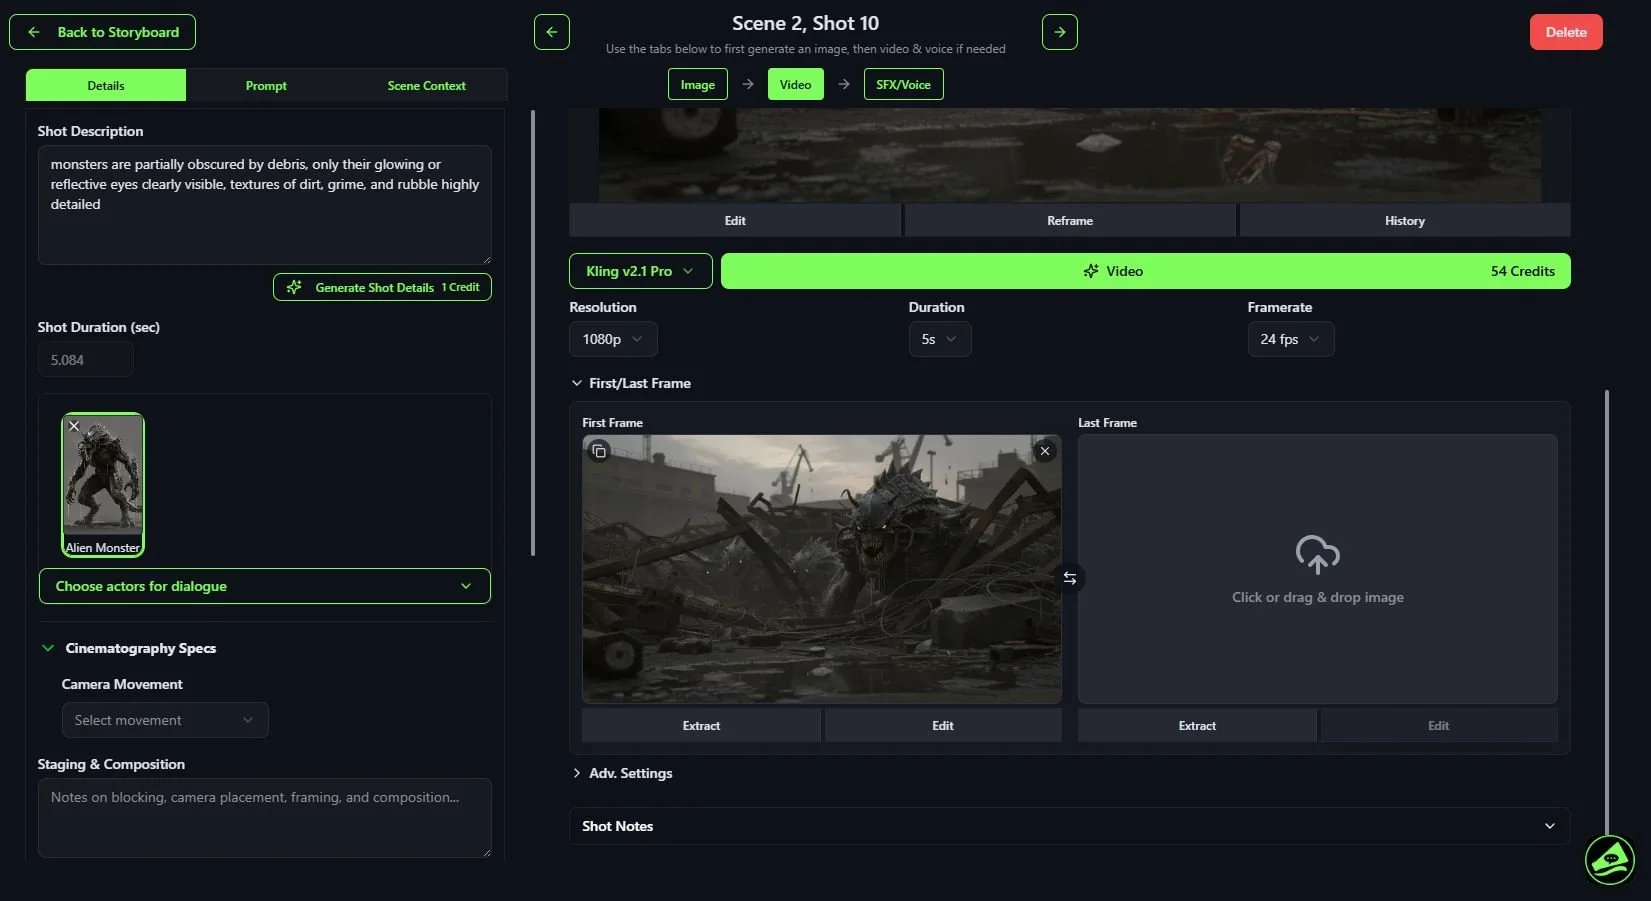
To add an image for the Last Frame, you have several options to choose from:
Copy Image - Click on the icon in the upper left corner of the First Frame. This will copy the image to the Last Frame. From here you can Edit this image.
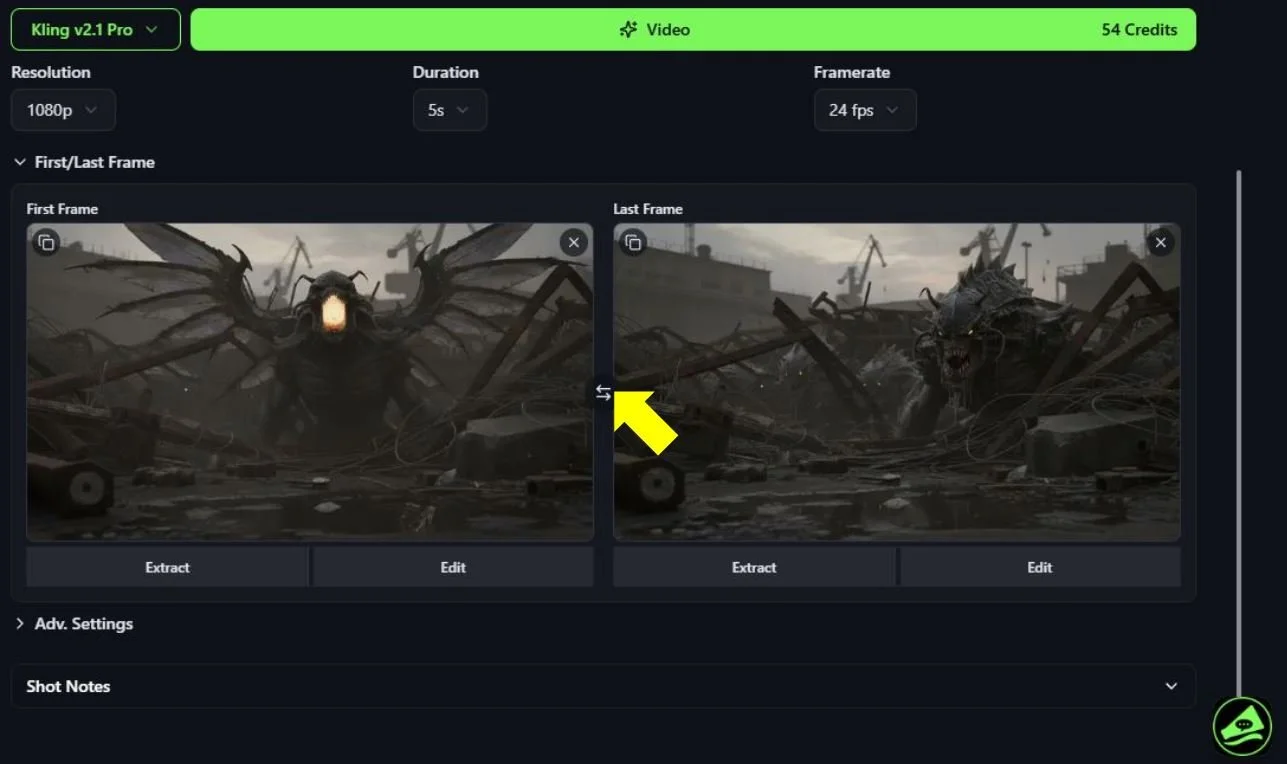
Flip Images - If you wish to move the First Frame to Last, or switch the Last frame with the First, click on the double arrows in-between the images.
Adding an image from My Library: Click on the empty image window to bring up My Library. In the My Library window, you will be able to choose from any image you have uploaded into My Library as well as images you have generated in other projects. Select the image you want to use and then click the Confirm Selection button. You will have the option to crop the image if you want before it appears in the Last Frame image window.
Uploading an image: You can drag and drop any image from your computer into the image window to upload it. Again, you will have the option to crop the image before it appears in the Last Frame image window.
Extract Frame: This very powerful feature allows you to extract frames from videos, allowing you to extend shots indefinitely. Click on the Extract button under the Last Frame image window. This will open the Extract Frame menu where you will see several options. These options are covered in the section below.
Extracting a Frame
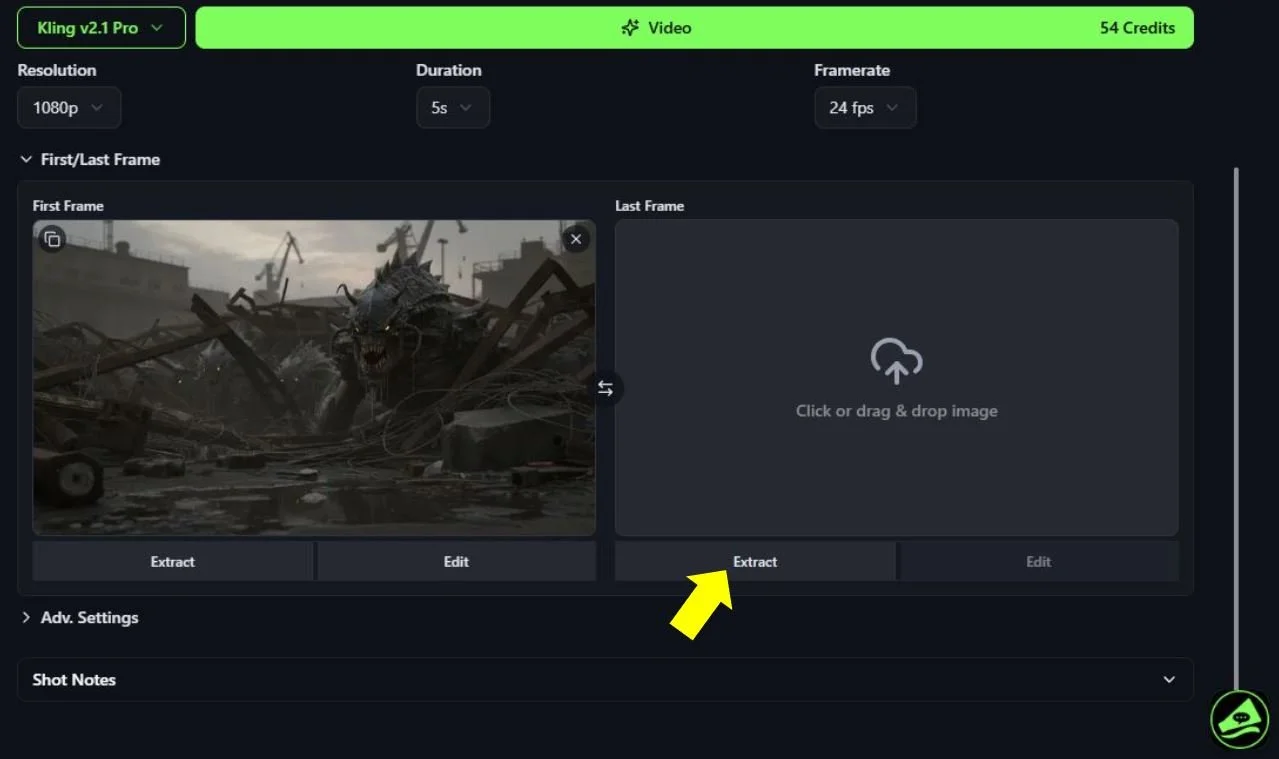
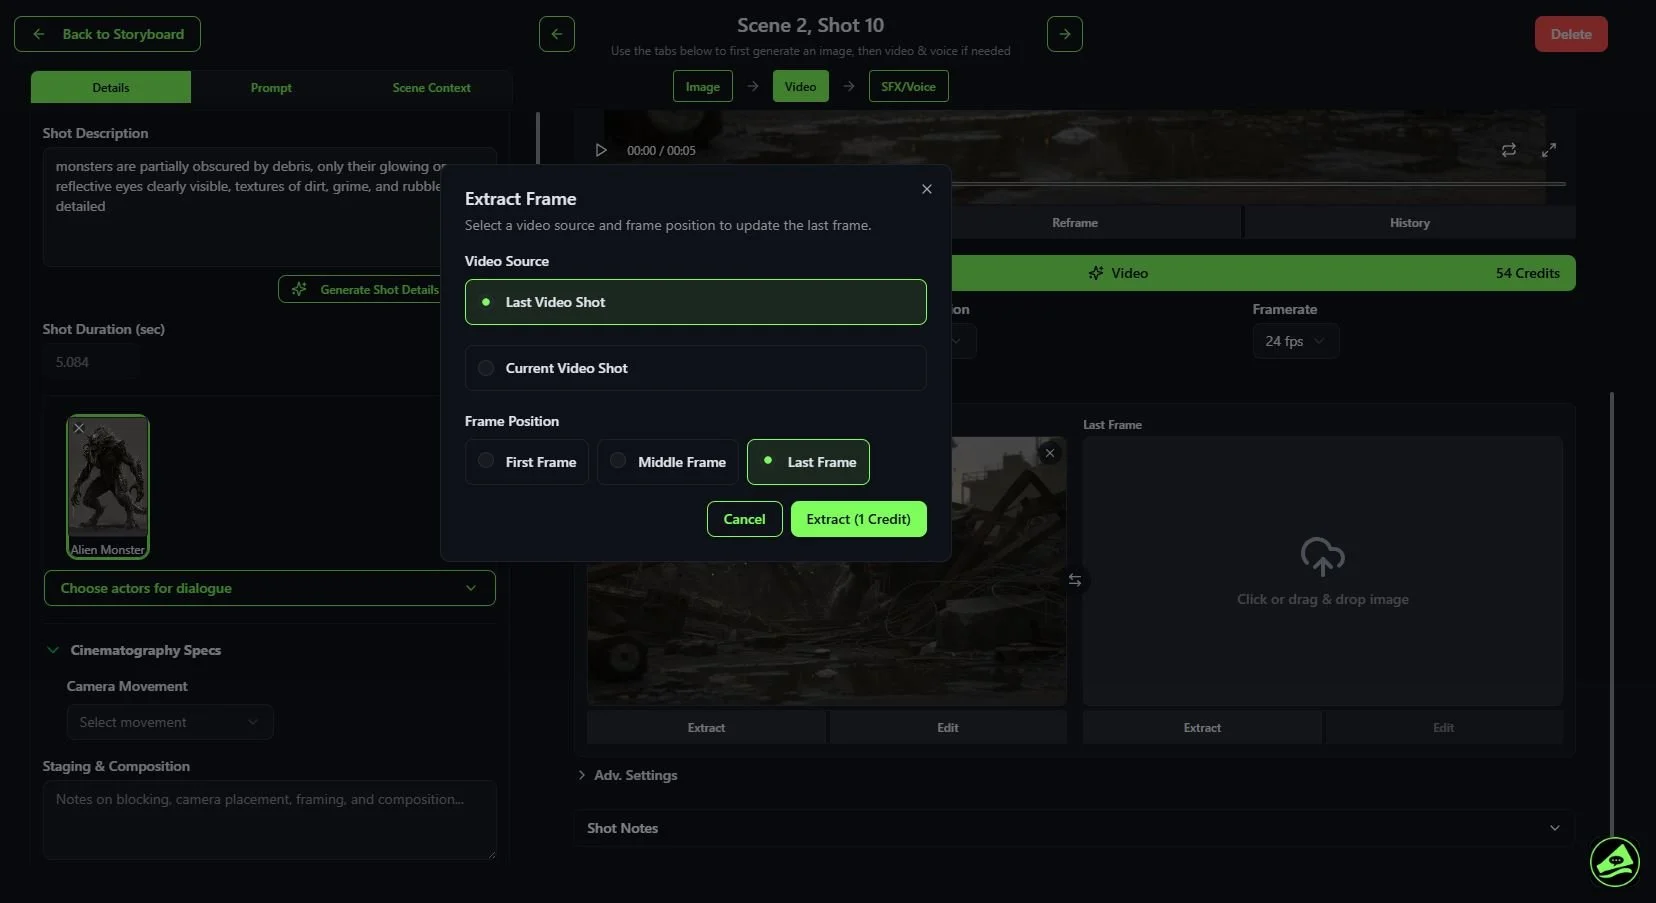
In the Extract Frame window, you can select a video source and frame position to add an image frame from that video for either the First or Last frame.
Select the Video Source. You have two options to choose from:
Last Video Shot: Select this option to extract a frame from the video that was generated for your previous shot. For example, if you are currently in Scene 1, Shot 2, selecting this option will extract a frame from the video in Scene 1, Shot 2. If no video has been generated or uploaded for the previous shot, the Last Video Shot option will not be available.
Current Video Shot: Select this option to extract a frame from the video that you have generated or uploaded for the shot. If no video has been generated or uploaded for the shot, the Last Video Shot option will not be available.
Select the Frame Position. You have three options to choose from:
First Frame: Select this option to extract the first frame of a video.
Middle Frame: Select this option to extract the middle frame of a video.
Last Frame: Select this option to extract the last frame of a video.
When you are ready to extract a frame, click on the green Extract button. The frame will appear in either the First or Last Frame image window.
Adding an image
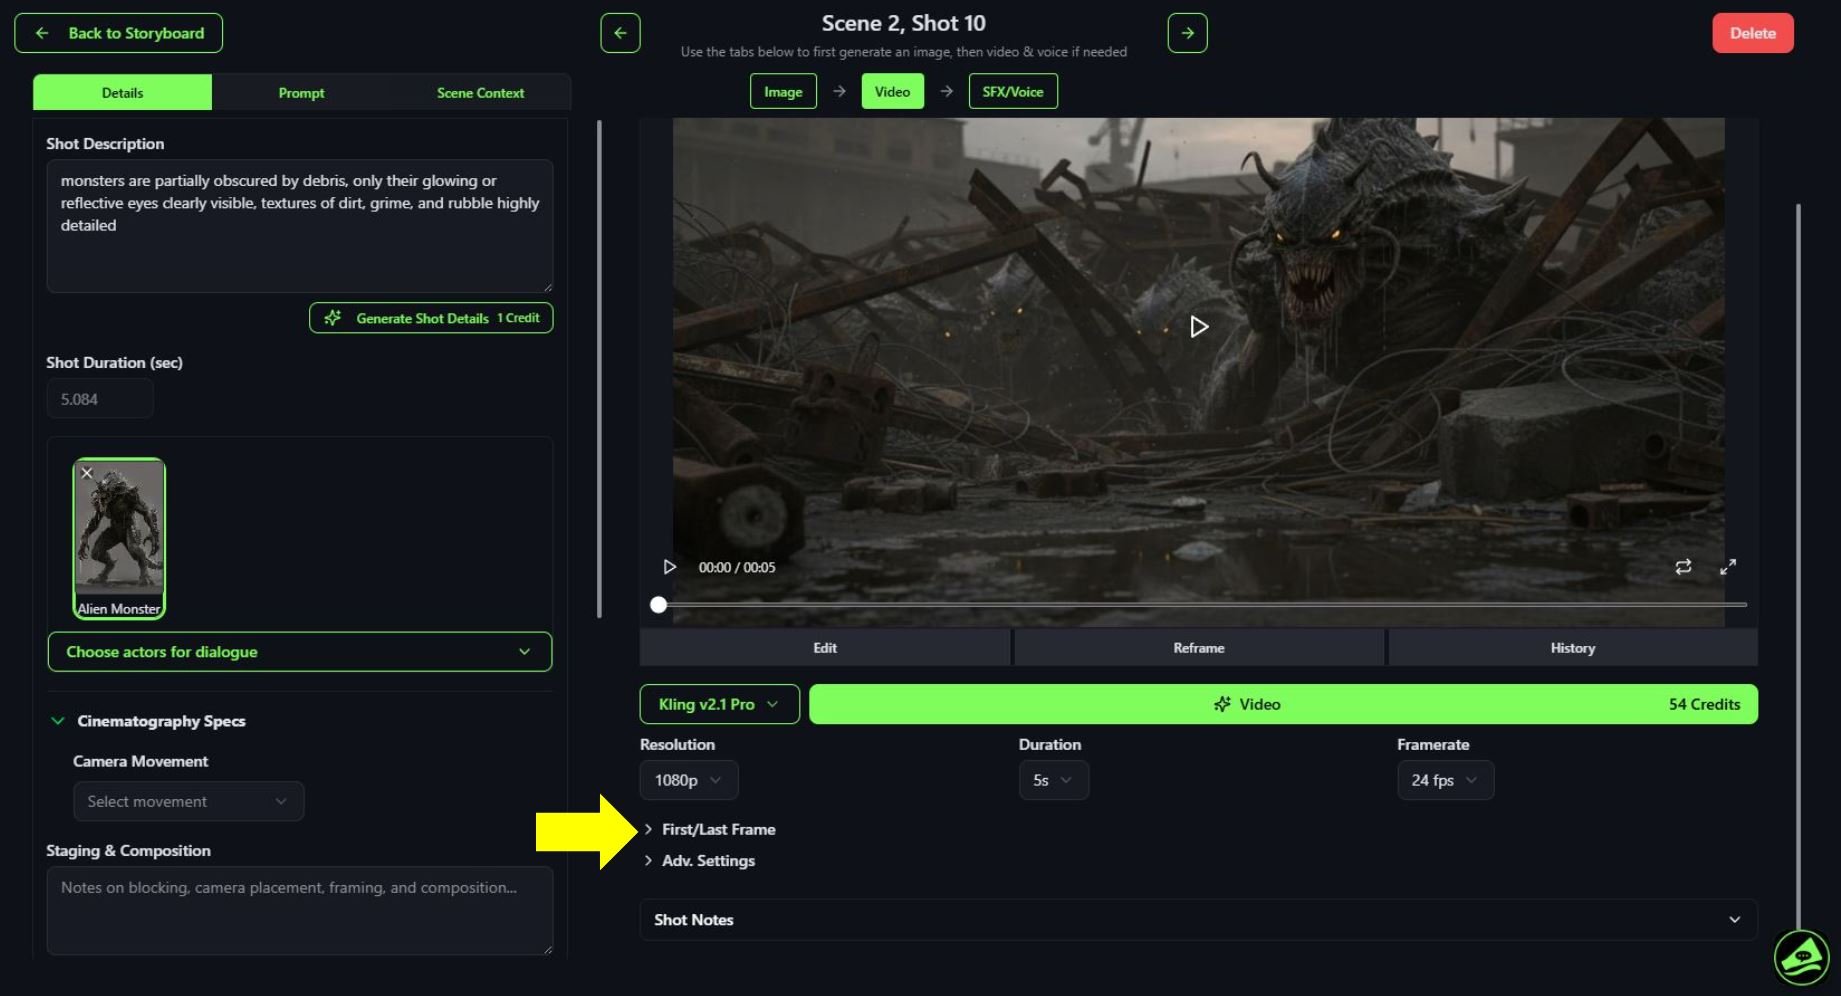
In a Storyboard shot, video models that use First/Last Frame will show a sub menu for this feature under the video preview window. Click on it to open the First/Last Frame section.
Editing a Frame
If you currently have an image in the First or Last Frame image window, you have the option to edit that image to your liking. To edit an image, click on the Edit button under the First or Last Frame image window. This will bring you to the Image Editor.
After you have generated an edited image, click on the Use this Generation button to have this image appear for your First or Last Frame. If you need more guidance on how to edit an image, please read the section called, Editing Images.
Additional Features
There are a few other additional features to mention when using First and Last Frame.
Duplicating an image: You can copy an image from either the first or last frame image window to use it in the other image window. To copy an image, move your mouse over the current image shown in the image window and then click on the Duplicate button in the top left corner of the window. This feature is useful for creating a first and last frame video. A simple example of this would be to have a person walking from one side of the street to the other side. You just edit the image you copied in the Image Editor to make these small changes to the image.
Swapping an image: You can swap an image in the First Frame image window to move it to the Last Frame image window, and vice versa. To swap an image, click on the Swap button, located between both image windows.
First Last Frame Prompt
Make sure your video prompt reflects the shot you want to create with the First and Last Frames. Describe the action.
Generating a First/Last Frame Video
When you have both the First and Last frame images set up the way you want them to be, just click on the (Generate) Video button.